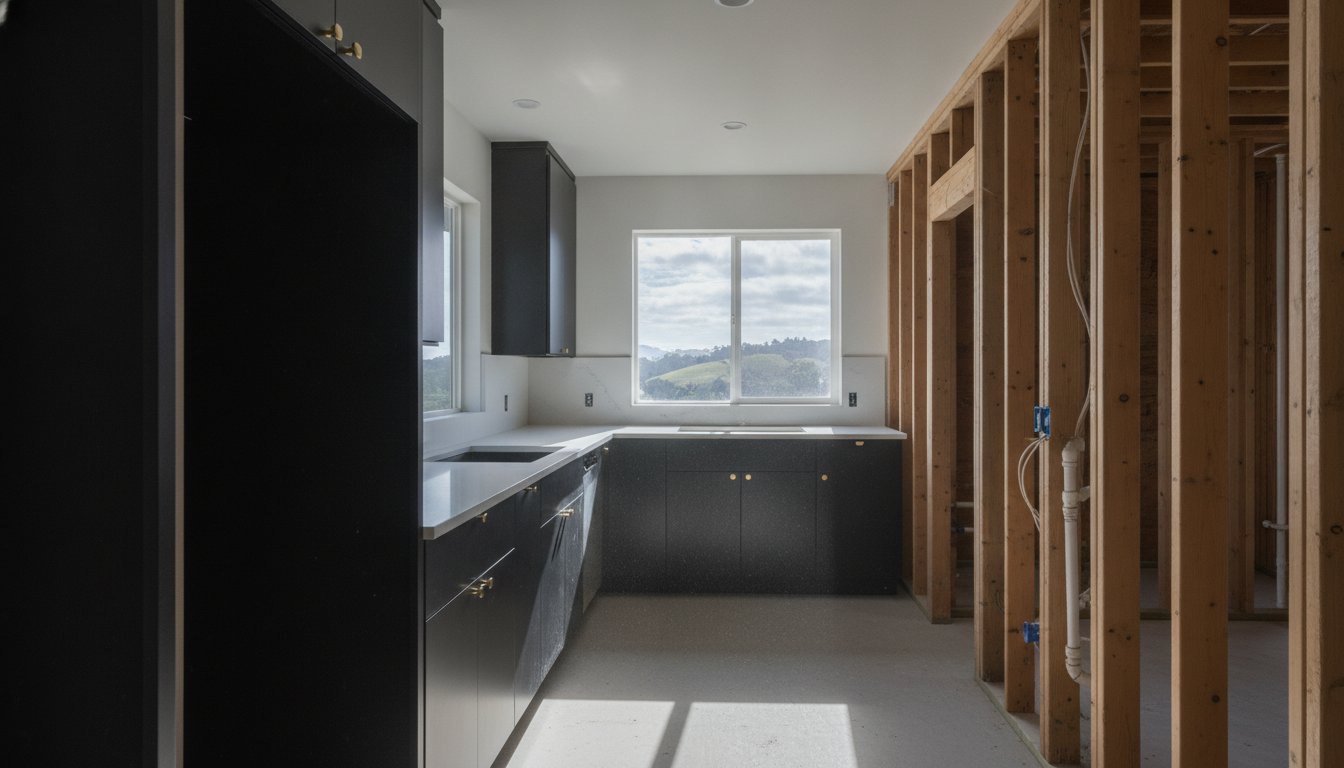
The Ultimate Guide to a Galley Kitchen Remodel: Maximizing Space and Structure
A galley kitchen remodel is often viewed as a compromise in square footage, but when executed with structural precision, it becomes the most efficient engine of the home. You likely feel the squeeze of narrow counters and outdated cabinets every time you prep a meal. It's common to feel stuck between a cramped layout and the daunting prospect of removing load-bearing walls. We believe the foundation of a great kitchen starts with the bones of the house. A successful project requires a steady hand and a clear plan to turn a narrow space into a high-performance workspace.
You can achieve an open-concept feel and increase your property value without sacrificing the structural integrity of your home. This guide provides professional insights on how to maximize your footprint through smart storage solutions and high-performance layouts. We'll examine the essential components of a successful renovation, from structural framing to 2026 design trends like defined task zones. You'll learn how to navigate building codes and material choices to ensure your new kitchen is built to last for decades.
Key Takeaways
- Learn why maintaining a four-to-five-foot aisle width is the "Goldilocks" zone for balancing movement and cooking efficiency.
- Identify the critical requirements for load-bearing wall reinforcements when opening up a galley kitchen remodel for an open-concept feel.
- Master the use of a unified color palette and reflective materials to visually expand narrow dimensions without compromising structural integrity.
- Understand the essential steps for navigating Bay Area building permits and structural framing to ensure a professional-grade finish.
Understanding the Galley Kitchen Layout and Its Potential
A galley kitchen remodel begins with an appreciation for its linear architecture. This layout consists of two parallel runs of cabinetry and countertops separated by a single central aisle. It's modeled after the compact cooking quarters on ships and aircraft, where every inch must serve a purpose. While some see it as a limitation, professional chefs often prefer this configuration. The "hallway" style keeps all essential tools within a tight pivot, creating a highly efficient workspace for serious meal preparation.
The Anatomy of a Galley: Parallel Efficiency
The Galley Kitchen Layout is a masterclass in the work triangle. By placing the sink, stove, and refrigerator in a corridor, you reduce the physical steps required to move between tasks. However, the efficiency of this setup depends on identifying structural obstacles early. Many older Bay Area homes contain plumbing stacks or load-bearing pillars hidden behind the drywall of these narrow spaces. A successful galley kitchen remodel requires a thorough inspection of these "bones" before any demolition begins. You must account for the fixed points that cannot be moved without significant structural framing work.
- Dead-end Galleys: These feature a wall at one end. They create a private, low-traffic cooking zone that prevents guests from wandering through your prep area.
- Walk-through Galleys: These act as a thoroughfare between rooms. They require careful planning to manage foot traffic without disrupting the cook.
Identifying Your Remodel Goals: Aesthetics vs. Structural Change
Before you choose cabinet finishes, you must decide if you want a cosmetic facelift or a full structural reconfiguration. A cosmetic update focuses on surfaces like quartz countertops and semi-custom cabinetry. A structural remodel, however, might involve knocking through a wall to create an open-concept feel. In cities like San Francisco or Palo Alto, removing a load-bearing wall to expand a galley can significantly increase property value. This requires specialized expertise in load-bearing wall reinforcements to ensure the house remains stable. We focus on the foundation of the project first. Once the structure is secure, the aesthetic choices follow naturally. Setting a realistic baseline for your small-space footprint helps avoid mid-project delays and unexpected costs.
How to Maximize Space and Workflow in a Narrow Kitchen
The success of a galley kitchen remodel depends on finding the "Goldilocks" zone for your central aisle. We aim for a width between 4 and 5 feet. If the aisle is narrower than 4 feet, you won't have enough clearance to open a dishwasher and walk past it simultaneously. If it exceeds 5 feet, the efficiency of the layout breaks down because you have to take too many steps between parallel counters. This precise measurement ensures the space remains functional for one cook while allowing a second person to pass through without causing a bottleneck.
Optimizing the Work Triangle in a Linear Space
In a narrow corridor, the traditional work triangle becomes a flattened, staggered arrangement. You should avoid placing the sink directly opposite the range. Staggering these high-use areas allows two people to work back-to-back without physical interference. We recommend placing the refrigerator at one end of the run to keep "grazers" out of the primary cooking zone. For safety and function, ensure every major appliance has at least 15 inches of adjacent countertop space to serve as a landing zone for hot items or grocery bags. This simple rule prevents accidents and keeps the workflow steady during complex meal prep.
Eliminating visual clutter is just as important as the physical layout. We utilize integrated appliances and paneled fronts to create a continuous, unbroken line along the walls. This technique tricks the eye into seeing a wider space. If your project requires moving gas lines or heavy plumbing to achieve this flow, partnering with experts in kitchen remodeling ensures these structural changes meet local Bay Area codes.
Smart Storage Solutions: Verticality and Hidden Cabinets
When horizontal space is limited, we look to the ceiling. Installing floor-to-ceiling cabinetry is the most effective way to gain storage without shrinking the aisle. These "to-the-ceiling" units eliminate the dust-collecting gap above standard cabinets and provide a perfect home for seasonal items. We often incorporate pull-out pantries into these tall banks of cabinetry. These units utilize deep, narrow gaps that would otherwise be wasted, allowing you to view your entire inventory with one steady pull.
- Custom Corner Solutions: In L-shaped galleys, we use "Magic Corner" pull-outs to recover space in deep, blind corners.
- Vertical Dividers: Narrow 6-inch cabinets are ideal for vertical tray dividers to store baking sheets and cutting boards.
- Deep Drawers: We prefer heavy-duty deep drawers for base cabinets because they offer better access to heavy pots than standard shelving.
Planning a galley kitchen remodel requires a balance between storage volume and physical clearance. By prioritizing vertical real estate and staggered appliance placement, you create a kitchen that feels professional and spacious, regardless of its actual footprint.
Structural Solutions: Opening Up the Galley for an Open-Concept Feel
A standard galley kitchen remodel often focuses on surface-level updates, but the most dramatic results come from altering the room's physical footprint. In many Bay Area homes, the kitchen is enclosed by walls that restrict light and movement. Opening one side of the corridor creates an immediate sense of space. It turns a narrow workspace into a social hub. This transformation allows for a modern lifestyle where the cook remains part of the conversation in the living area. However, this isn't just about a better view. It's a high-stakes task that requires a professional eye to ensure the home's structural integrity remains intact during and after the demolition phase.
Load-Bearing Wall Removal: When and How to Knock Through
You must identify whether a wall is load-bearing before the first swing of a hammer. Most parallel walls in a galley setup support the weight of the roof or the floor above. A professional engineer provides the calculations needed to replace these walls with a structural beam. The process follows a strict sequence to maintain safety. First, we install temporary shoring walls to carry the load while the original studs are removed. Shoring isn't a suggestion; it's a requirement for a safe job site. Next, we fit a steel or Laminated Veneer Lumber (LVL) beam into the ceiling cavity to span the new opening. Finally, we reroute the electrical circuits and plumbing lines that were hidden inside the old wall. This methodical approach prevents sagging or structural failure in the years to come.
Strengthening the Bones: Framing and Foundation Considerations
Opening up a kitchen often changes where the weight of your home rests. If you replace a wall with a heavy kitchen island or a long run of stone countertops, you may need foundation stabilization. We look at the "bones" of the house to see if the existing floor joists can handle the new concentrated loads. Proper structural framing is essential here to prevent the floor from bouncing or the new cabinetry from settling unevenly. We also prioritize floor leveling during this stage. A galley kitchen depends on parallel lines. Even a minor slope in the subfloor will make your countertops and upper cabinets look misaligned. By addressing these foundational issues first, you ensure the professional-grade finishes you choose later will sit perfectly and last for decades.

Design Strategies to Visually Expand a Small Galley Kitchen
Visual expansion is the final layer of a successful galley kitchen remodel. While structural changes provide the physical room, design choices provide the atmosphere. We use a unified palette to minimize visual breaks. When cabinets, walls, and trim share the same light-reflective color, the boundaries of the room seem to recede. This technique prevents the "tunnel" effect common in narrow corridors. For 2026, we see a shift toward warm neutral palettes like creamy whites and taupes. These colors provide the brightness needed for a narrow space without feeling clinical. Flooring also plays a critical role. Installing planks parallel to the longest wall draws the eye forward, making the kitchen feel longer. Conversely, a diagonal pattern can make a tight aisle appear wider by breaking up the linear grid.
Lighting Layers: Task, Ambient, and Accent
Lighting layers transform a dark corridor into a bright, functional workspace. We start with recessed ceiling lights to provide even, shadow-free illumination without taking up physical space. These should be spaced to eliminate dark spots on prep surfaces. Under-cabinet LED strips are essential for task lighting. They brighten the "cave" feeling often found beneath upper cabinets and ensure safety during knife work. If your remodel includes an opening to a dining area, pendant lights serve as a visual anchor. They define the transition between the kitchen and the living space while adding a decorative element that draws the eye upward.
Material Choices: Reflective Surfaces and Unified Palettes
Reflective surfaces are a craftsman's secret for expanding small spaces. Light-colored stone or quartz countertops are superior to dark granite because they bounce light rather than absorbing it. We often recommend high-gloss finishes for cabinetry and glass tile backsplashes for the same reason. Handle-less cabinets further streamline the look. They remove the visual noise of hardware and prevent snags in a narrow aisle. Mirrored toe-kicks are a subtle but effective trick; they reflect the floor to create the illusion that the cabinets are floating and the floor extends further than it actually does. These small details, when combined, create a professional-grade finish that feels open and airy.
If you're ready to transform your narrow space with these professional techniques, contact us for a kitchen remodeling consultation to discuss your specific structural and design needs.
Executing Your Remodel: From Planning to Professional Installation
Execution is where the theoretical design meets the reality of the structure. A galley kitchen remodel requires tighter tolerances than almost any other home project. Because you're working with parallel runs of cabinetry in a confined space, a measurement error of even half an inch can prevent a dishwasher from opening or leave you with an uneven aisle. We follow a "measure twice, cut once" philosophy to ensure every component fits perfectly within the existing bones of the house. This precision is what separates a professional installation from a standard renovation. It ensures that the workflow we planned on paper translates perfectly to the physical space.
The project timeline typically moves from demolition and structural shoring to rough-ins and final finishes. You should expect the heavy structural work to happen early in the process. This is the stage where we address load-bearing wall reinforcements and framing. Once the skeleton of the room is secure, the project moves into the rough-in phase for plumbing and electrical. Only after the walls are closed and leveled do we begin the installation of cabinets and countertops. This methodical sequence prevents delays and ensures each trade has a stable environment to perform their work.
Budgeting for a Professional Galley Transformation
Strategic budgeting involves prioritizing the "bones" before the finishes. While high-end appliances are appealing, they won't fix a sagging floor or outdated wiring. In older Lafayette or San Francisco homes, we often discover hidden costs like corroded pipes or ungrounded electrical systems behind the drywall. Allocating a portion of your budget for these structural necessities is an investment in your home's longevity. Quality framing and foundation stabilization ensure that your new custom cabinets don't shift or crack over time. A solid foundation is the best way to protect your long-term financial investment.
Local Bay Area Regulations and Permitting
Navigating the bureaucracy of local building departments is a critical part of the execution phase. Cities like Walnut Creek and Palo Alto have specific requirements for structural changes and electrical upgrades. For instance, modern codes often require updated AFCI and GFCI outlets to meet current safety standards. Handling these permits requires a deep understanding of local amendments to the International Residential Code. A professional kitchen remodeling contractor manages this entire process for you. We coordinate with city inspectors and ensure every phase of the work meets or exceeds local safety requirements. This partnership provides peace of mind, knowing your remodel is legally compliant and structurally sound.
Secure the Future of Your Kitchen Renovation
A successful galley kitchen remodel transforms a narrow corridor into a high-performance workspace by prioritizing the bones of the home. We've discussed how finding the perfect aisle width and utilizing vertical storage creates efficiency without wasting movement. You've also learned that opening up the space requires precise structural framing and foundation stabilization to handle new loads safely. These physical improvements don't just update the look; they protect the structural integrity of your property for decades. We focus on the foundation first because a beautiful kitchen is only as good as the skeleton supporting it.
Our team brings years of experience to every project, specializing in load-bearing wall reinforcements and complex structural solutions. We serve the entire San Francisco Bay Area with a focus on precision and reliable craftsmanship. If you're ready to move beyond cosmetic fixes and invest in a kitchen built on a stable foundation, we're here to help. Start your structural kitchen transformation with Builders Group And Design today. You can achieve a professional-grade kitchen that combines modern open-concept aesthetics with lasting durability.
Frequently Asked Questions
Is a galley kitchen remodel worth it for a small home?
A galley kitchen remodel is one of the most effective ways to increase a small home's property value and daily functionality. This layout provides the highest level of cooking efficiency by minimizing the distance between prep, cooking, and storage zones. It allows you to invest in high-quality materials over a smaller surface area, ensuring a professional-grade finish that lasts for decades without requiring a massive footprint.
How much does it cost to remove a load-bearing wall in a galley kitchen?
The cost to remove a load-bearing wall depends on the span of the opening and the structural requirements of your specific home. This process requires temporary shoring, the installation of a steel or LVL beam, and often foundation stabilization to manage the new load points. Every project is unique, so a professional engineer must provide a site-specific assessment to determine the exact structural needs and safety requirements for your property.
What is the ideal width for a galley kitchen aisle?
The ideal width for a galley aisle is between 4 and 5 feet. This range provides enough clearance to open appliances like dishwashers and ovens while still allowing a second person to pass through comfortably. If the aisle is narrower than 4 feet, the space feels cramped; if it exceeds 5 feet, you lose the efficiency that makes the galley layout so effective for serious cooking.
Can I add an island to a galley kitchen layout?
You typically cannot add a traditional island to a standard galley layout without removing one of the parallel walls. A galley is defined by two opposing runs of cabinetry, and adding an island in the center would block the essential workflow and aisle clearance. However, if you remove a wall to open the kitchen to a living area, the remaining run can be paired with a large island to create a modern, open-concept feel.
How do I make a galley kitchen feel less like a hallway?
You can reduce the "hallway" feel by utilizing a unified light color palette and layered lighting. Replacing some upper cabinets with open shelving creates a sense of depth and breaks up the heavy, closed-in look of parallel walls. We also recommend installing flooring planks parallel to the longest wall to draw the eye forward and lengthen the room visually, which helps the space feel more like a room and less like a corridor.
Do I need a permit for a galley kitchen remodel in the Bay Area?
You definitely need a permit for a galley kitchen remodel in the Bay Area if the project involves structural changes, electrical upgrades, or plumbing relocation. Cities like San Francisco and Palo Alto have strict requirements for load-bearing wall reinforcements and modern circuit standards. A licensed contractor handles the application process and coordinates with city inspectors to ensure all work meets local building codes and safety regulations.
What are the best appliances for a narrow kitchen space?
Counter-depth refrigerators and integrated appliances are the best choices for narrow spaces. These units sit flush with your cabinetry, preventing bulky corners from protruding into the aisle and creating a "no-snag" environment. We also suggest utilizing slim-profile ranges or 18-inch dishwashers if your footprint is exceptionally tight. These choices save valuable linear footage for extra countertop prep space.
How long does a professional galley kitchen renovation typically take?
A professional galley renovation typically takes between 6 and 12 weeks from demolition to the final finish. The timeline varies based on the extent of structural work, such as knocking through walls or reinforcing the foundation. While cosmetic updates move faster, projects requiring structural framing and city inspections require a methodical, step-by-step approach to ensure the integrity and quality of the final product.